Monday, May 9, 2011

The Tale of How A Sheared Bolt Was Fixed and How Another Problem Came to Be

Finally, after months of driving around with only three bolts holding the steering rack in place, I took the initiative and decided to fix the bolt that I had sheared off. If you don't know what I'm talking about, go here. The first time I tried to fix the problem, I drilled a hole that was off-center from the axis of the piece of bolt that's stuck in the subframe. The hole was too large to use a screw extractor and the only option left was to bore that hole out even more and tap it. The screw that holds the rack is an M10-1.25, which means that diameter of the screw is 10 mm and the the spacing between the screw's teeth is 1.25 mm. This is very important information since I have to get a specific sized drill and tap to make it all work properly. I ordered an 8.8 mm drill and a M10-1.25 tap from McMaster-Carr. They'll ship to you on an open order, which means you don't have to pay which, in turn, means that you can return said items if you only use them once.

There I am under my car, bolts undone, bracket moved over to one side. I'm ready to drill this bitch. With my trusty drill in hand, the safety glasses come down, and we start drilling. Hot flecks of steel begin to shoot out away from the drill. We must go deeper. A couple of chips hit my face and one leaves a burn on my nose. The drill suddenly starts to wobble; I'm holding it at a bad angle. Suddenly, the drill tip snaps clean off and is left in the hole. I pull it out and head to the shop to see what I can find.

There are no metric drills. I could either use an S or an 11/32" drill. The former is slightly larger than 8.8 mm and the latter is slightly under 8.8 mm. There is no S, but there is an 11/32" drill. I use this drill to get through that last few millimeters of metal and start drilling into the subframe. That's far enough.

Now it's time to tap this hole. It's quite easy to break a tap in a hole if you don't know what you're doing, but I do so don't worry. I apply some anti-seize compound to the tap to get it nice and lubricated and I start to thread the recently drilled hole. It goes in smoothly and cuts the threads like a hot knife through butter an electric carving knife through a fresh-out-of-the-oven turkey breast.

Finally, it is tapped. Look at those threads, they're beautiful (ignore the burrs). It's time to put the screws in and bolt it in place. I adjust everything properly and get ready to screw it in place. I put one screw in and tighten it slightly and then I put the other screw in and start to torque it all down. Fate, however, would not let me have this victory. Suddenly, after both screws are torqued down, pop! The threads on the other screw gave up the ghost (stripped). Now, I have the same problem again but different. There are two ways to fix this. 1.) Get a new subframe or 2.) get a threaded insert. I'll go with the second, that's easiest.


Now I have to get my hands on a 12.5 mm drill, an M14-1.25 tap, and some Loctite.  

Wednesday, March 23, 2011

Origins - The Why of This Blog

Back Story

It all started on that fateful Saturday afternoon. It was February the 26th and my girlfriend and I had left Brooklyn to head towards the Museum of Natural History. My girlfriend was headed to a photo scavenger hunt to be followed by free Shake Shack (for her) and I said I'd go with her (because I had nothing else to do). It was a beautiful day out, the first warm and sunny day in some time. My heart was filled with great expectations. Unfortunately, New Jersey caught wind that it was nice out and decided to fill up all my Manhattan with their foul faces and all my parking spaces with their stupid SUVs. I was pissed off. I had circled the area surrounding the museum to no avail; there was nowhere to park. It was useless. I dropped off my girlfriend near the museum with the intention of continuing the search for a parking spot but seeing yellow plate after yellow plate brought my blood pressure up to a good 160 over 80.

Methods

Fuck it.


I couldn't take it anymore. That's when I decided I'd head to my 
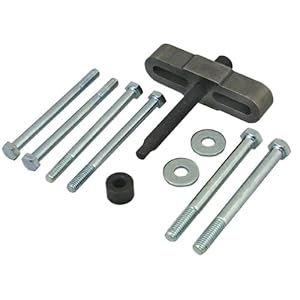
workshop to see if I could take care of some business. I had previously ordered a set of Whiteline steering rack bushings that are stiffer than the stock bushings and that, hopefully, would help me out with the memory steer issues I was having. Ever since I've owned my car, the steering wheel would often be cocked to the left or right ever so slightly when going straight, depending on whether I turned left or right. I didn't like this; it was annoying and I needed to fix it.

I was ready. I had the bushings and tools in hand, the car's front end was lifted off the ground, and I had a piece of cardboard ready so I wouldn't get my clothes dirty. I got under the car and locate where the steering rack is clamped on. All the forums said to start with the passenger side, that it's the easiest side to do, so I get to wrenching. I don't know why I thought my 1/2" wrench would be enough to loosen the salty, rust riddled bolts but they didn't budge no matter how hard I pushed or pulled. I couldn't find any penetrating oil, although I could swear I left some around somewhere, but I was able to find a foot and a half long steel tube.

I climbed under the car and just behind the front crossmember, which is what the engine sits on and the steering rack and the rest of the suspension are bolted to, and I cautiously start wrenching away at the first bolt. The loud cracks of the bonds of rust breaking echo throughout the workshop and pretty soon, the bolt starts coming loose. Perfect! I'll be done in no time. Those fools on the forums; this is easier than Laurie! I start to work on the second bolt and but this time it makes more of a creaking than cracking sound. The more I wrench, the more resistance I feel. Suddenly, out of nowhere, there is no resistance.

Results

Fuck, I just sheared the bolt.

This is not the first time that this has happened to me. I broke one of the studs that holds the exhaust to the turbocharger. Fortunately, in that case, I still had some stud left to ensure the exhaust is held on. This time, the rest of the bolt was stuck inside the front crossmember with only one option for removal. I have to drill a hole in that fucker and try to extract it.

I didn't have time or the extractor to pull the end piece of the bolt, so I was forced to install only one of the bushings and clamp it on with only one screw. I was afraid to do the other end in case I sheared a second bolt. Strangely enough, there was almost no play in the rack on the passenger's side. This was satisfactory. I still needed to get the other bushing on but that's a story for another day.

The amount of time that had elapsed escapes me, but I needed to go pick up my girlfriend from the museum. She and her friend had finished their photo scavenger hunt and had their fill of some of the best burgers and shakes in Manhattan. I was dirtier and more greasy than South Jersey and I somehow smelled like motor oil.

Solution


Nonetheless I updated my Facebook status and my friend Tony provided me with the best suggestion I've heard in some time: Start a blog. Tony, you motherfucking genius. So I did and that's why you're here.

Wednesday, March 9, 2011

New Steering Universal Joint

I went out to lunch this afternoon and when I came back, I had a nice surprise waiting on my desk. It was the universal joint that I ordered for my car. When I was remedying the damage cause by the job that brought forth the idea for this blog, I managed to strip some of the splines on rack side of the joint (that's the end in the picture with the bolt in it). Now, I'm not in any danger. The steering works perfectly, but I'd rather be safe than sorry.

The following Sunday night, I went on the dealer's website to see what the part costs. It was approximately $150. Eff that, I thought. That's when I hopelessly went on eBay to see if there was anything available. Lo and behold, there was ONE universal joint available for the low, low price of $20. ($150 - $20 = $130 in savings!) I did the logical thing and I bought it! I will probably try to install it next, next week because by this time on Friday, I'll be in Los Angeles for a week.

Tuesday, March 8, 2011

How To Remove and Reinstall the Steering Wheel

So, I'm kind of going to start this in the middle. The story as to why I'm removing and reorienting my steering wheel and ultimately the why of this blog will come when I can think of something to write in a bit. 


Anyway, as it turns out, for some reason to be explained later, my steering wheel was turned about 20 degrees to the right when the wheels were straight. Obviously, this is not bad but it's definitely annoying and doesn't feel right. There are two ways of remedying a situation such as this: 1.) Jack up the car, get under it, remove the steering column's universal joint, and reinstall it correctly or 2.) Sit inside the car, remove the steering wheel, reorient it, and reinstall it. I don't have the time right now to pick option one, which is also the correct choice, so I went with option 2, the temporary fix.


After work today, I headed over to my local Autozone, which is conveniently just 10 minutes from home, and I picked up a steering wheel puller. If you've never seen one, they're quite simple. 
It's just a big clamp. It was 14 bucks and I'll probably return it. 

I got into my car and sat in front of the steering wheel. As a safety precaution, the battery should be unplugged. There are two T30 screws on other side of the wheel that hold the airbag housing to the wheel, making removal of the airbag extremely simple. Once the screws are loosened and the wiring harness is unplugged, the airbag can come out easily. I laid the airbag down flat on its back in the passenger footwell.

Now that the airbag is off, it was time to take off the steering wheel nut. This is the hard part. Unfortunately, I didn't have a breaker bar so I had to use my 3/8" ratchet, a 17 mm socket, and a lot of muscle. After a minute or two of struggling, the nut broke loose. I removed it and put it to the side.

Getting the actual steering wheel off is not easy without the help of the puller. Two long 13 mm hex head screws go into two holes on the wheel and the slots in the puller and the third 9/16" hex head screw is pressed against the shaft the steering is on. I began tightening the middle screw and suddenly, bang!, the steering wheel came loose. Then I undid the wiring harness for the horn and I was in business.
I repositioned the steering wheel but I couldn't get it absolutely straight. Since the steering wheel hub and the column shaft are splined, there isn't much change of getting the wheel on dead straight without getting a wheel alignment. Luckily, I was able to get it within 3 to 4 degrees from center.

So now, we go backwards! Reinstall the wiring harness for the horn, rethread the center nut, and bust out the torque wrench. The service manual says to tighten the nut to 44 lbf-ft, so I set my torque wrench and went at it. Two clicks later, the wheel was on tight. I picked up the airbag and I clipped the harnesses together. I placed the airbag in the wheel and tightened the two screws on both sides.


15 minutes later, I was done! I packed up my tools, started the car, pulled out of the Autozone parking lot, and headed home. Next week, I'll teach you how to cook a perfect filet mignon with potatoes au gratin and asparagus on your Subaru's exhaust manifold.